
The examples below describe several common requests including authentication, device and task creation, getting a list of platforms, and getting device information using Postman (see also how to use Postman for load testing).
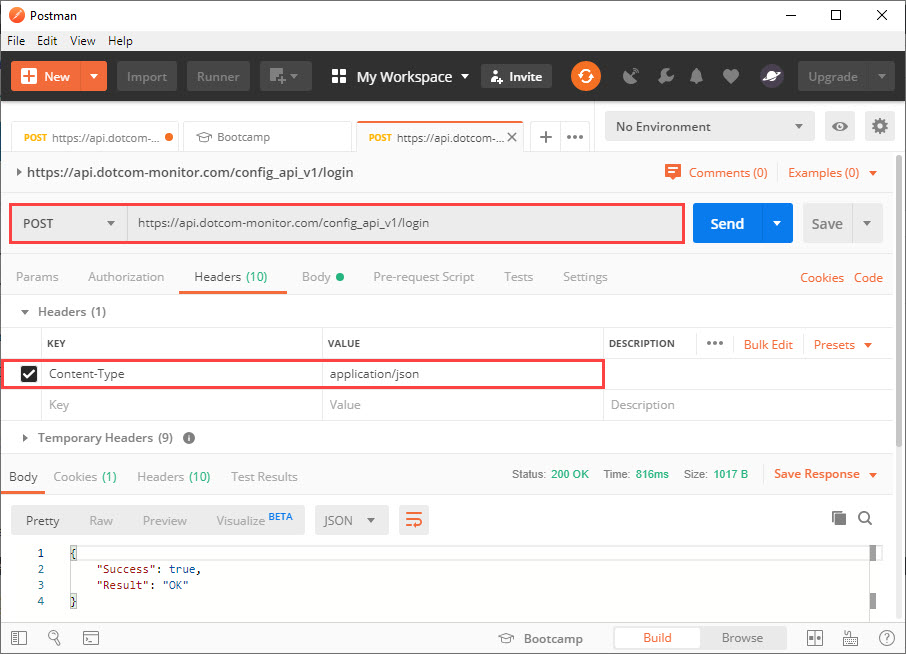
To start with the Dotcom-Monitor API, the HTTP/HTTPS header must have Content-Type set to application/json.
For the API Method details, see the corresponding article from the Methods category.
Login
For authentication, use POST URI “/login“. When you sign on via the “/login” call, a new client session begins. Sessions expire automatically after a predetermined length of inactivity. The default is one minute. If you make an API call, the inactivity timer is reset to zero.
When your session expires, the exception HTTP error code,“401 – Unauthorized,” is returned. If this happens, you must log in again.
It’s recommended to use your integration UID for logging in (Account > Integration > UID).
POST /config_api_v1/login HTTP/1.1
Host: api.dotcom-monitor.com
Content-Type: application/json

{
"UID":"0E206D45650A4ACD8EB689B8CC25FA7F"
}
Get Platforms
To get the list of Monitoring Platforms, use GET URI “/platforms“. If the request succeeds, the server responds with an HTTP status code and the list of all available platforms. It’s recommended to save the response in order to use your account details (package ID, platforms ID, device ID, etc.) in subsequent requests.
GET /config_api_v1/platforms HTTP/1.1
Host: api.dotcom-monitor.com
Content-Type: application/json
Create a Device
Use data received in the “GET Platforms” response to create a JSON request. The device parameters that are not specified in the request will be set to default.
POST /config_api_v1/devices?verb=PUT HTTP/1.1
Host: api.dotcom-monitor.com
Content-Type: application/json

{
"Postpone":"true",
"Frequency":60,
"Package_Id":465,
"Platform_Id":12,
"Locations":{2,4,6,18,68},
"Name":"TESTDEVICE 9.23.2019"
}
Create a Task
Post /config_api_v1/tasks?verb=PUT HTTP/1.1
Host: api.dotcom-monitor.com
Content-Type: application/json

{
"Name":"testname",
"Url":"https://www.dotcom-monitor.com",
"Device_Id":123456,
"RequestType":"GET",
"Task_Type_Id":2,
"DNSResolveMode":"Device Cached"
}
Get and Edit Device Information
To edit device information, first, send a GET request with the device ID in URI to receive the server response.
GET /config_api_v1//device/193403 HTTP/1.1
Host: api.dotcom-monitor.com
Content-Type: application/json

Next, use the response body to modify device parameters and send back the JSON request with new values.
POST /config_api_v1//device/193403 HTTP/1.1
Host: api.dotcom-monitor.com
Content-Type: application/json

{
    "Avoid_Simultaneous_Checks": false,
    "Alert_Silence_Min": 0,
    "False_Positive_Check": false,
    "Locations": [
        1,
        2,
        3,
        4,
        6,
        11,
        13,
        14,
        15,
        18,
        19,
        23,
        43,
        68,
        97,
        113,
        118,
        138,
        153,
        233
    ],
    "Send_Uptime_Alert": false,
    "Status_Description": "POSTPONED",
    "Postpone": true,
    "Owner_Device_Id": 0,
    "Frequency": 10800,
    "Filter_Id": 7791,
    "Scheduler_Id": 0,
    "Notifications": {
        "E_Mail_Flag": false,
        "E_Mail_Address": null,
        "E_Mail_TimeInterval_Min": 5,
        "WL_Device_Flag": false,
        "WL_Device_Email_Address": null,
        "WL_Device_TimeInterval_Min": 15,
        "Pager_Flag": false,
        "Pager_Area_Code": null,
        "Pager_Phone": null,
        "Pager_Num_Code": null,
        "Pager_TimeInterval_Min": 15,
        "Phone_Flag": false,
        "Phone_Area_Code": null,
        "Phone_Phone": null,
        "Phone_TimeInterval_Min": 15,
        "SMS_Flag": false,
        "SMS_Phone": null,
        "SMS_TimeInterval_Min": 15,
        "Script_Flag": false,
        "Script_Batch_File_Name": null,
        "Script_TimeInterval_Min": 0,
        "SNMP_TimeInterval_Min": 0,
        "Notification_Groups": []
    },
    "Id": 193403,
    "Number_Of_Tasks": 1,
    "WaitingForApproval": false,
    "Platform_Id": 12,
    "Package_Id": 465,
    "Name": "Under_Task"
}
Additional information on How to Create Devices with Dotcom-Monitor APIs is available on our Wiki.